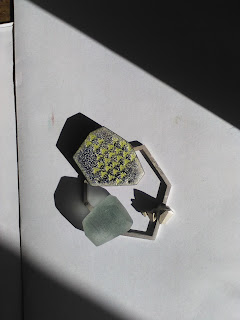
Into the final week of making for the Street project... I realised that this was crunch time, and I had to pull it all together.
My first task was to drill a stone setting in the cast piece - this was tricky - initially I tried using the pillar drill, but broke a drill bit which became embedded in the piece. I decided to turn it over and use the other side, soldering the drill bit side down. I tried bursting solder over the drill bit to cover it, but this didn't work.
I hand-drilled the other side, hoping that my hand was steady enough to create a good straight recess for the stone. I then made my brooch pin housing and clasp from rectangular wire and tube.
Then I needed to solder it them on - easier said than done! I had a bit of trouble with the solder paste - it looked as though they were fixed, but I hadn't heated it for long enough and the tube came off when I was trying to clean everything up.
Thankfully, it did work the second time, with help from Colin, our tutor - the cast piece had been soldered in place, and was drawing heat away from that area of the brooch. With a fairly low flame he heated the cast element and flicked the flame to burst the solder under the pin housing... success.
After this I soldered on my prongs to hold the enamel piece. This took more time than I had bargained for - I ended up trying four or five times, and ended the day on 19 May with only one prong in place. However, I came in fresh the next day and soldered the other prong without too many problems.
Now I needed to clean up. Although I really love the white finish given by the pickle, it is hard to maintain, so I cleaned the piece in the magnetic polisher. This gave it a very shiny finish, which I am not very keen on. I took a small brass mop brush to give the whole piece a scratchy finish.
In short, my plans to start making the piece in the last two weeks did not allow enough time for last-minute changes. If I were to re-do this project I would start making the brooch back two weeks earlier, to allow for plenty of finishing time.
The Street project is having to move fast. I made a brooch back from square wire - at first I made two pieces from 1.5 wire, but then decided it was a bit flimsy to hold the pieces. I made another shape in 2mm wire, and this seemed much more what I wanted.
Decided on a fairly complex shape with a lot of angles.. however, using a mitre jig makes this a lot easier to manage.
Here he is - we call him Magic Mike. And he is!
I was soon into my favourite part - arranging the pieces together.
I kept seeing more objects that could be developed into more elements for the project, but already felt I had too many!
At the point when I thought I had my design fairly fixed I started moving on to adding pieces to hold the enamel. I decided to solder a piece of sheet silver to the wire as a platform for my prongs to sit on. I had made the holes quite small in the enamel piece, so only 0.7mm wire would go through.
In my first attempt at soldering the sheet silver to the wire, I melted two of the solder joins in the wire - knocking the angle out and making the sheet the wrong shape. Another join had gone out of true on the other side. I had to heat this again and push the wires flat on a fireproof block.
I had been trying to solder it this way up (above).
My solution was to cut another sheet, and solder it the other side up, with honeycomb blocks supporting the wire. I painted all of the solder joins with rouge to prevent them from melting. It worked!
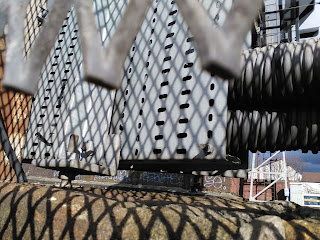
I started by taking photos of a walk home from the city - lots of interest to be found. I love the light that hits Glasgow in the spring.
This led to a lot of drawing... I developed a few shapes that started to recur. I liked the gridlike patterns of railings and netting particularly.
I was thinking of etching some of these patterns into enamelled copper, but it soon became clear that they didn't show up well on the samples I had. I tried the bolder images, but they still didn't show clearly enough - the pattern was only just visible under light, but it had only etched the shiny surface of the enamel away.


